About Mortise and Tenon Joints
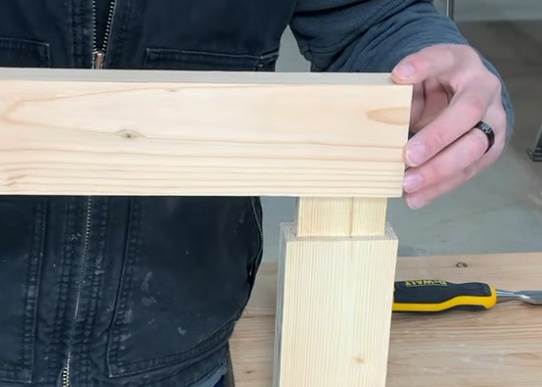
The mortise and tenon joint is a traditional woodworking joint that connects two pieces of wood, typically at 90 degrees. One piece receives a rectangular cavity called the mortise, and the other piece is shaped with a matching projection called the tenon. When cut accurately, this joint provides high strength, good alignment, and long-term durability.
The joint is widely used in furniture, doors, frames, chairs, tables, and structural timber work. Its strength results from substantial long-grain glue surface, mechanical interlock, and the ability to add pegs or wedges if required.
In most cases, the mortise is cut into the thicker or fixed member (such as a table leg), while the tenon is on the thinner or rail member. The joint can be glued, pinned, wedged, or a combination depending on the design and required strength.
Key Components and Terminology
A clear understanding of the main parts and terms helps ensure accurate planning and communication of measurements:
- Mortise: A rectangular hole or cavity cut into a workpiece.
- Tenon: A projecting tongue that fits into the mortise.
- Cheeks: The large flat faces of the tenon that meet the sides of the mortise.
- Shoulders: The surfaces at the base of the tenon where it steps down from the full thickness of the workpiece. These control alignment.
- Haunch: A small extension or reduced-height portion of a tenon used near the edge or in frame-and-panel construction.
- Haunched mortise: A mortise that includes space for the haunch.
- Through mortise: A mortise that passes completely through the stock, visible on both sides.
- Blind (or stopped) mortise: A mortise that does not exit the opposite face.
- Stub tenon: A short tenon that does not extend deeply into the mortise, often used in non-structural joints.
Common Types of Mortise and Tenon Joints
Different configurations of the joint serve different structural and design needs. The core cutting process is similar, but dimensions and details change:
| Joint Type | Description | Typical Applications |
|---|---|---|
| Standard (rectangular) mortise and tenon | Full-width tenon with shoulders on all sides, sized to the mortise | Table rails to legs, frames, chair rails, general furniture |
| Through mortise and tenon | Tenon protrudes through to opposite face, can be flushed or wedged | Visible frame joints, structural work, aesthetic emphasis |
| Blind or stopped mortise | Mortise stops before opposite face, tenon hidden | Fine furniture, when appearance on back face matters |
| Haunched mortise and tenon | Partial-height tenon extension (haunch) near edge for added support | Frame-and-panel doors, narrow rails near end grain |
| Stub tenon | Short tenon (often 6–12 mm deep) for alignment rather than strength | Light frames, interior trim, non-structural assemblies |
| Twin or double tenon | Two narrower tenons in one wide joint area | Wide rails, thick structural members, improved glue surface |
| Wedged tenon | Tenon with kerfs for wedges driven after assembly | Chair construction, knock-down or mechanically locked joints |
Planning and Sizing the Joint
Accurate sizing is essential for a strong, reliable joint. The proportions must suit the thickness and width of the stock, the wood species, and the load on the joint.
Key considerations include tenon thickness, tenon length, cheek fit, shoulder width, and mortise wall thickness. A joint that is too tight increases risk of splitting; too loose reduces strength and alignment.
Tenon Thickness and Mortise Width
Tenon thickness is usually defined as a fraction of the stock thickness. Common guidelines for most hardwoods and softwoods:
- Tenon thickness around one-third of the thickness of the mortised member.
- Maintain roughly equal wall thickness on both sides of the mortise.
- For very thick stock, tenon thickness may be slightly less than one-third to preserve wall strength.
Example guidelines:
| Stock Thickness (Mortise Member) | Recommended Tenon Thickness | Approximate Mortise Wall Thickness (each side) |
|---|---|---|
| 19 mm (3/4 in) | 6 mm (1/4 in) | 6 mm (1/4 in) |
| 25 mm (1 in) | 8–9 mm (5/16–3/8 in) | 8 mm (5/16 in) |
| 32 mm (1-1/4 in) | 10–11 mm (3/8–7/16 in) | 10 mm (3/8 in) |
| 38 mm (1-1/2 in) | 12–13 mm (1/2 in) | 12 mm (1/2 in) |
| 50 mm (2 in) | 16 mm (5/8 in) | 16–17 mm (5/8–11/16 in) |
Tenon Length and Mortise Depth
Tenon length is established by the required embedment and whether the mortise is through or blind:
- Blind mortise: Tenon typically 1.5–2 times its thickness in depth (e.g., 12 mm thick tenon embedded 18–25 mm).
- Through mortise: Tenon runs completely through, often protruding 1–3 mm for flushing, or more if wedged decoratively.
- Structural joints: Use deeper tenons when stock allows, while leaving enough material at the back of a blind mortise to avoid splitting.
Leave a safety margin at the bottom of a blind mortise, often 3–5 mm of material, to prevent breakout on the far side during chopping.
Shoulder Width and Layout Clearance
Shoulders control alignment of the parts. Common practice is to maintain shoulders on at least two adjacent faces, and frequently on all four for rectangular rails. Typical shoulder guidelines:
- Minimum shoulder width: around 3–4 mm for small work, 5–8 mm for furniture-scale pieces.
- For wide rails, equal shoulders on both edges help resist cupping and twisting.
- On narrow or thin rails, haunches add extra support near the edges.
Tools and Materials Required
The joint can be cut with hand tools, machine tools, or a combination. Selection depends on existing equipment, required speed, and project scale. The core requirement is the ability to cut accurate, straight mortise walls and tenon cheeks.
Hand Tools
Common hand tools for mortise and tenon work include:
- Marking gauge or mortise gauge with paired pins to mark both sides of the mortise and tenon simultaneously.
- Marking knife and pencil for precise layout of shoulders and reference lines.
- Mortise chisels sized to the mortise width, or bench chisels in corresponding sizes.
- Back saw or tenon saw for cutting shoulders and cheeks.
- Bevel gauge, square, and ruler for checking angles, depth, and squareness.
- Router plane or shoulder plane for fine-tuning tenon cheeks and shoulders.
Machine Tools and Power Tools
For repeated or large-scale work, machines improve consistency and speed:
- Drill press with suitable bits for roughing out mortises.
- Dedicated hollow-chisel mortiser for square, consistent mortises.
- Router with straight bits and edge guides or jigs for mortises, and occasionally for tenons.
- Table saw or band saw for tenon cheeks and shoulders, using a miter gauge, sled, or tenoning jig.
- Oscillating multi-tool or trim router for cleaning mortise ends if needed.
Adhesives and Accessories
For assembly, typical requirements include:
- Wood glue suitable for interior or exterior use depending on project (e.g., PVA for interior furniture, waterproof glue for outdoor items).
- Clamps sized to reach across the joint and provide even pressure.
- Brushes or glue spreaders to coat mortise and tenon surfaces.
- Dowels or pegs if pinning through the joint, along with a drill and appropriate bit.
Layout and Marking Techniques
Accurate layout ensures that mortise and tenon align properly. A joint cut from a single consistent set of reference lines is more likely to fit on the first attempt.
Establishing Reference Faces
Begin by designating one face and one edge of each workpiece as the reference surfaces. These should be flat, straight, and used consistently when setting gauges and measuring. Mark them with pencil or a light knife mark to avoid confusion during cutting.
Marking the Mortise
Follow these steps for mortise layout:
- Set the mortise gauge to the desired mortise width, ideally matching the width of the mortise chisel or bit.
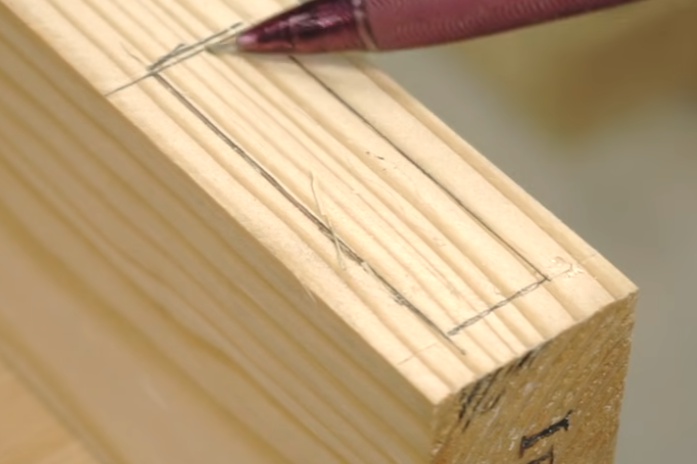
- Using the reference face and edge, run the gauge to mark parallel lines defining the mortise width on the mortised member.
- Mark the mortise length from the layout diagram or cut list, referencing actual rail width where the tenon will intersect.
- Lightly deepen the end lines with a marking knife to control chisel placement and reduce tear-out.
Transferring Layout to the Tenon
Because the gauge setting defines both mortise width and tenon thickness, use the same setting to mark the tenon:
- With the gauge unchanged, mark the tenon cheeks on the end of the rail and along the length of the cheeks.
- Use a square and marking knife to define shoulder lines around all relevant faces, measuring tenon length from the end of the rail.
- Verify all marks correspond to the mortise location by dry-placing the rail on the mortised member and visually aligning.
Cutting the Mortise by Hand
Hand chopping mortises is precise and requires control over chisel angle and depth. It is often efficient for small quantities of joints and standard furniture work.
Chisel Selection and Setup
Choose a mortise chisel whose width matches the mortise layout. A snug fit minimizes side-to-side movement and ensures straight walls. Sharpen and hone chisels before starting, with a bevel suitable for the wood species (common bevel angles around 25–30 degrees for hardwoods and slightly lower for softwoods).
Step-by-Step Hand Chopping Process
A simple, repeatable approach to chopping a blind mortise by hand follows this sequence:
- Secure the workpiece firmly in a vise with the mortise face accessible and well-supported.
- Start slightly in from one end of the mortise (2–3 mm) with the chisel held vertical, bevel facing toward the center of the mortise.
- Drive the chisel down with moderate blows, then lever out waste toward the center. Avoid levering against the end grain outside the mortise lines to prevent splitting.
- Work along the mortise in small steps, leaving the last few millimeters at each end uncut to avoid breaking out the end walls.
- Once near full depth, reverse the chisel with bevel toward the previously cut area to refine the bottom and straighten the walls.
- Return to the ends and carefully chop down to the layout lines with minimal levering, maintaining vertical alignment.
- Clean the mortise bottom with vertical cuts and light paring if necessary, but avoid over-widening the mortise.
Check depth with a rule or depth gauge, and verify that the walls are parallel and straight. Slight taper toward the bottom can help with glue spread and insertion but should be minimal.
Cutting the Mortise with Machines
Machine-cut mortises are efficient for repetitive work. The goal is to combine speed with controlled, consistent results while keeping the work securely clamped.
Drill Press Method
The drill press method uses overlapping holes to remove most of the waste:
- Set the depth stop to the desired mortise depth, leaving a small safety margin.
- Clamp the workpiece so that the mortise centerline is aligned beneath the drill bit.
- Use a brad-point or Forstner bit slightly smaller than the mortise width to minimize overcutting.
- Drill a series of overlapping holes along the mortise length, staying inside the layout lines.
- Use a chisel or router to square and refine walls and ends after drilling.
Hollow-Chisel Mortiser
A hollow-chisel mortiser uses a square chisel around a drill bit to cut mortises with straight sides in one operation. To use it effectively:
- Install a chisel and bit matched to the desired mortise width.
- Adjust bit protrusion from the chisel according to manufacturer recommendations to prevent burning and improve chip extraction.
- Clamp the workpiece against the fence with the mortise marked side up and aligned to the chisel.
- Begin at one end, plunging straight down and retracting slowly to clear chips.
- Proceed along the mortise in overlapping cuts, slightly overlapping each plunge.
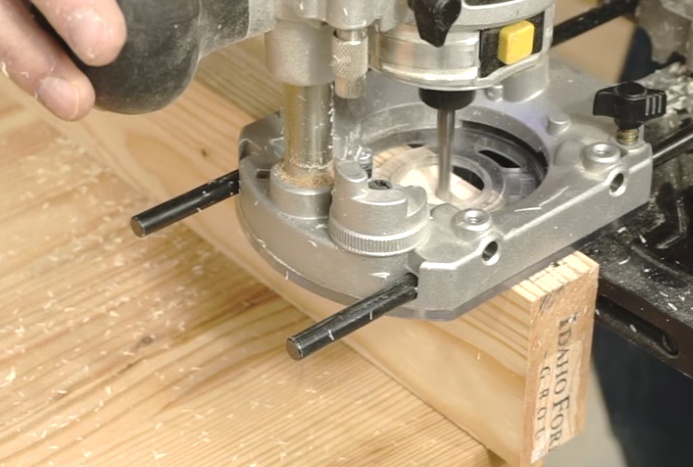
Router-Based Mortising
A router with a straight bit and edge guide or jig can produce accurate mortises:
- Set up an edge guide or fence to locate the mortise width-wise, and stops at each end for length control.
- Use a straight or spiral bit in a size close to the mortise width, or make multiple passes to achieve the full width.
- Make multiple depth passes, increasing depth gradually to avoid overloading the bit.
- Clean up minor imperfections with a chisel, especially at the squared ends.
Cutting the Tenon by Hand
Hand-cut tenons provide control over the final fit and are practical for short runs or custom joints. The aim is to saw just outside the layout lines and then refine to fit.
Sawing the Shoulders
Shoulders create crisp transitions and control the visual alignment of the joint:
- Secure the rail flat on the bench or in a vise with the shoulder lines visible.
- Use a back saw or tenon saw with fine teeth for clean cuts.
- Start each cut at the near edge, using a light touch and guiding the saw in the knife line.
- Saw down to the cheek layout lines without crossing into the tenon body.
- Repeat on all faces where shoulders are required.
Sawing the Cheeks
Cheeks determine the tightness of the joint and must be parallel and flat:
- Clamp the rail vertically or at a comfortable angle with the end facing up.
- Saw along the cheek layout lines from the end, keeping the saw aligned with both the end and side lines.
- Cut just outside the line to leave material for fine-tuning.
- Remove waste between cheeks and shoulders, then refine with a chisel or shoulder plane.
Refining the Tenon by Paring
Final fit is often achieved by careful paring:
- Use a sharp chisel or shoulder plane to shave thin layers from the cheeks, checking frequently in the mortise.
- Work from the shoulder toward the end of the tenon to avoid splitting the shoulder.
- Maintain cheek surfaces flat and parallel; avoid twisting the tool while paring.
Cutting the Tenon with Machines
Power tools can cut tenons quickly and consistently, especially for series work where the same dimension repeats many times.
Table Saw Tenoning
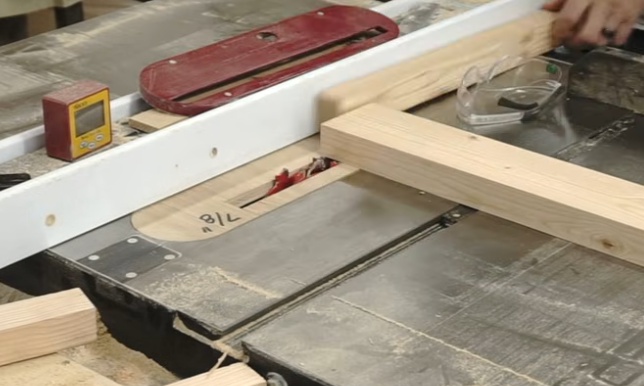
On a table saw, tenons are cut using a miter gauge or sled, often with a dado stack or single blade:
- Set the blade height equal to the shoulder depth (stock thickness minus tenon thickness, divided by two for centered tenons).
- Use a miter gauge or tenoning jig to hold the workpiece vertical for cheek cuts, or lay it flat for shoulder cuts.
- Make test cuts on scrap of identical thickness to confirm tenon dimensions.
- Cut both cheeks, then rotate the workpiece to cut opposite faces symmetrically.
- Cut shoulders by laying the rail flat and referencing off the fence or miter gauge.
Band Saw Tenoning
A band saw is suitable for cutting tenons in thicker or irregular stock:
- Set the fence or use a miter gauge to guide straight cuts along the cheek lines.
- Cut cheeks slightly oversize and finish with planes or chisels.
- Cut shoulders with controlled, shallow passes to reach layout lines cleanly.
Router-Based Tenoning
Less common than mortising, router tenoning can be done with jigs:
- Use a jig or vertical router table setup to support the rail securely.
- Set the bit height and fence to create cheeks at the correct thickness.
- Make multiple passes to approach the final dimension, then fine-tune.
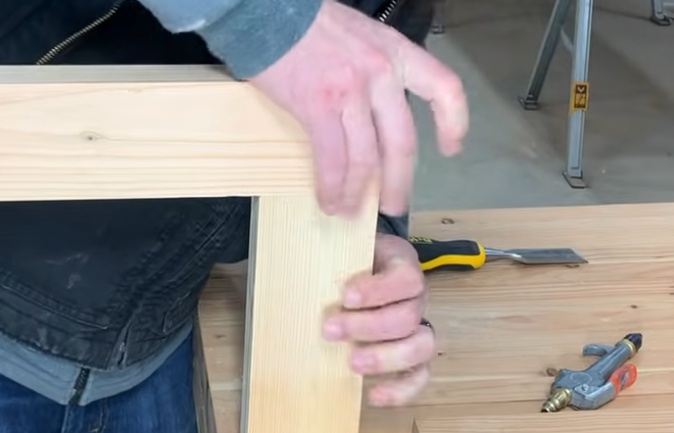
Fitting and Adjusting the Joint
Proper fit is essential for joint strength and ease of assembly. The target is a fit where the tenon slides into the mortise with firm resistance but without excessive force or risk of splitting.
Assessing the Fit
Test fitting involves partially assembling the joint without glue:
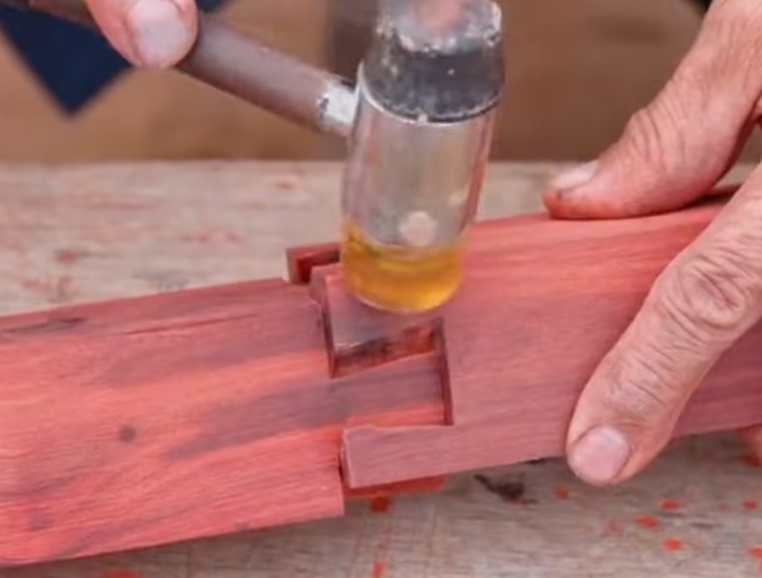
- Insert the tenon into the mortise by hand or with light tapping using a mallet and a protective block.
- Observe resistance; if the joint stops well before full depth, identify where it binds.
- Look for shiny burnished areas on the tenon cheeks or mortise walls that indicate tight spots.
Common Adjustments
Minor corrections are often required:
- If the tenon is too thick: Pare cheeks carefully, maintaining parallel faces and checking often.
- If the tenon is too long: Trim the end to avoid bottoming out in a blind mortise.
- If shoulders do not close: Confirm that the mortise is deep enough, ends are clear of debris, and shoulders are square.
- If the joint is loose: One option is to glue thin shims on the cheeks, then recut and refit; alternately, rely on mechanical reinforcement like pegs in non-critical situations.
Gluing and Clamping Techniques
Assembly consolidates the joint and sets long-term strength. Glue type and application method depend on environmental exposure and type of wood.
Glue Application
Apply glue to both mating surfaces for maximum bonding:
- Coat the mortise walls and bottom with a thin, even layer of glue using a brush or small stick.
- Spread glue on the tenon cheeks, end, and shoulders, but avoid heavy buildup that may hydraulically prevent full seating.
- For large or deep mortises, consider using a syringe or narrow nozzle for consistent coverage.
Clamping the Joint
During clamping:
- Bring the joint together by hand as far as possible before applying clamps.
- Position clamps so that pressure runs in line with the tenon, closing shoulders evenly.
- Check joint alignment in both directions with a square and adjust clamp pressure as needed.
- Wipe away excess squeeze-out with a damp cloth before it fully cures, particularly around visible shoulders and faces.
Curing and Handling
Leave the joint undisturbed for the full curing time recommended by the glue manufacturer. Avoid loading or stressing the joint prematurely to prevent micro-movements that weaken the bond.
Reinforcing Mortise and Tenon Joints
In applications subject to heavy loads, repeated stress, or environmental changes, reinforcement can enhance reliability. Reinforcement is especially useful when tenon length is limited or when using less dense wood species.
Pinned or Pegged Joints
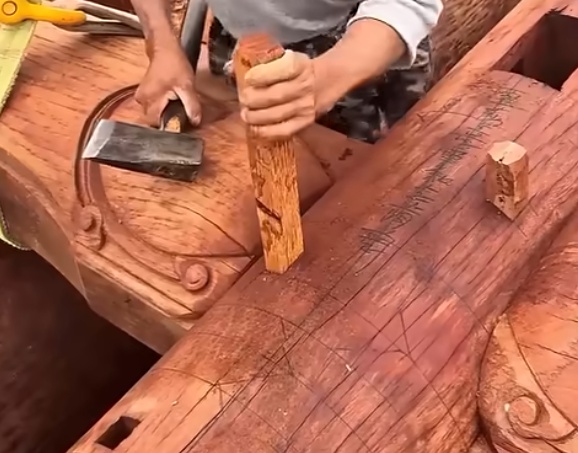
Adding wooden dowels or pegs through the joint provides mechanical locking:
- Dry-fit the joint and clamp it in its final position.
- Drill through the mortise and tenon at one or more locations, staying clear of edges and avoiding excessive weakening of the tenon.
- For drawbored joints, offset the tenon hole slightly toward the shoulders so the peg pulls the joint tighter when driven.
- Glue and drive the peg through, then trim it flush after curing.
Wedged Tenons
Wedged tenons mechanically spread inside a flared mortise for a permanent lock:
- Cut shallow kerfs in the tenon end, leaving enough material near the shoulders for strength.
- Shape wedges that match the kerfs and taper gradually for controlled expansion.
- Flaring the mortise slightly at the exit face allows the wedge to spread the tenon without splitting the surrounding wood.
- During assembly, insert the tenon, apply glue to the wedges, and drive them into the kerfs before trimming flush.
Typical Issues and Practical Considerations
Working with mortise and tenon joints involves certain practical constraints that influence method and design choices.
Wood Movement and Grain Direction
Because wood expands and contracts across the grain, not along it, joints must accommodate differential movement:
- Align tenons so that long grain meets long grain wherever possible for strength.
- On wide panels or rails, consider multiple narrower tenons or floating tenons to reduce stress concentrations.
- Allow room for seasonal movement in surrounding construction (frames and panels, table tops) without forcing the joint to absorb all movement.
Material and Tool Limitations
Tool reach, bit length, and chisel stiffness limit mortise depth. Very deep mortises can be problematic due to chip removal and sidewall stability. Adjust joint design by using multiple shorter tenons or thicker sections where necessary.
Accuracy and Repeatability
Consistency in multiple joints is important for assemblies like tables, chairs, and frames. Simple jigs for mortise positioning, depth stops, and tenon thickness reduce variation. Maintaining gauge settings and referencing from the same faces throughout the project helps ensure that parts assemble without stress.
Step-by-Step Example: Basic Blind Mortise and Tenon
This example summarizes a typical workflow for a furniture-scale joint connecting a rail to a leg using a blind mortise and tenon.
1) Layout
- Mark reference faces and edges on the leg and rail.
- Set the mortise gauge to one-third the leg thickness (for example, a 12 mm mortise in a 36 mm leg).
- Mark the mortise centered on the leg, and define its length equal to the rail width minus desired shoulder margins.
- Use the same gauge setting to mark tenon cheeks on the rail and define shoulders with a square.
2) Cut the Mortise
- Secure the leg and either chop the mortise by hand with a mortise chisel or use a drill press/router/hollow-chisel mortiser to remove the bulk.
- Refine and square the mortise walls and ends to the layout lines.
- Check depth to ensure enough room for the tenon with a small clearance at the bottom.
3) Cut the Tenon
- Saw shoulders around the rail to the layout lines.
- Saw cheeks slightly outside the gauge lines using a hand saw, table saw, or band saw.
- Remove waste and refine cheeks with a chisel or shoulder plane until the tenon nearly fits.
4) Fit and Adjust
- Test-fit the joint, noting tight spots.
- Pare high points on the cheeks and check that shoulders close fully on all sides when the joint is assembled.
5) Glue and Clamp
- Apply glue to the mortise and tenon surfaces.
- Assemble the joint, clamp it so shoulders close uniformly, and verify squareness.
- Clean glue squeeze-out and leave to cure for the specified time.
Conclusion
Mortise and tenon joints remain a fundamental method for creating strong, durable connections in wood. By understanding the proportions, carefully planning dimensions, choosing appropriate tools, and following systematic cutting and fitting procedures, woodworkers can produce accurate joints suitable for a wide range of projects. Consistent layout, controlled cutting, and methodical fitting are the main factors that determine the reliability and appearance of the finished joint.