Overview of CNC Engraving and Typical Failure Modes
CNC engraving is widely used for text marking, logo machining, decorative patterns, precision cavities, and micro-features on metals, plastics, composites, wood, glass, and stone. Compared with general milling, engraving uses smaller tools, finer stepovers, and higher spindle speeds, which increases sensitivity to setup errors and parameter selection.
Typical failure modes in CNC engraving include poor surface finish, dimensional inaccuracies, broken tools, visible vibration marks, incomplete engraving, thermal damage, and inconsistent depth. Many of these issues are related to the interaction between the tool, material, machine rigidity, clamping, and cutting parameters.
This guide focuses on practical, parameter-oriented troubleshooting and systematic methods that can be directly applied on CNC routers, engraving machines, machining centers, and hybrid machines used for fine engraving work.
Material, Tool, and Machine Fundamentals
Stable CNC engraving depends on compatibility between material, tool, and machine performance. Understanding each element helps prevent problems before they occur.
Material Characteristics and Their Impact
Different workpiece materials require specific cutting conditions. Important properties for engraving include hardness, toughness, thermal conductivity, abrasiveness, and chip formation behavior.
| Material | Key Characteristics | Common Issues | Parameter Tendencies |
|---|---|---|---|
| Aluminum alloys (e.g., 6061) | Soft, ductile, good machinability, tendency to stick to tools | Burrs, built-up edge, chip welding | High speed, medium feed, positive rake, strong chip evacuation |
| Brass / Copper | Soft to medium hard, good machinability | Smearing, edge burrs, thermal discoloration on copper | Moderate speed, moderate feed, sharp tools, light cut |
| Carbon steel (e.g., 1045) | Medium hardness, higher cutting forces | Tool wear, chatter, rough surface | Moderate speed, lower feed, rigid clamping, coated tools |
| Stainless steel (e.g., 304) | Work hardening, low thermal conductivity | Rapid tool wear, burrs, heat marks | Lower speed, moderate feed, avoid rubbing, coolant required |
| Hard plastics (acrylic, PC) | Thermoplastic, low softening temperature | Melting, edge chipping, cloudiness | High speed, lower chip load, very sharp tools, strong chip removal |
| Wood and MDF | Nonhomogeneous, fibrous | Tear-out, fuzziness, dimensional variation | High speed, adequate feed, upcut/downcut selection by surface requirement |
Tool Geometry and Coating Selection
Tool selection is central to engraving quality:
- Tool type: V-bit, ball nose, flat end mill, tapered end mill, drag engraving tool.
- Tip diameter or radius: determines minimum line width and achievable detail.
- Flute count: 1–2 flutes for softer materials and plastics, 2–4 flutes for metals.
- Helix angle: higher helix improves surface finish but can increase pull-out forces.
- Coating: TiN, TiAlN, DLC and others extend life in metals and abrasive materials.
Incorrect geometry, blunt edges, or inappropriate coating often result in burrs, poor finish, and tool breakage.
Machine Rigidity, Spindle, and Motion System
Machine structure defines how aggressively you can engrave:
- Rigidity: gantry stiffness, bearing quality, and frame mass affect chatter and vibration marks.
- Spindle: maximum speed, torque curve, and runout affect small-tool stability.
- Motion system: ball screws, linear guides, and servo/stepper configuration influence accuracy, backlash, and repeatability.
For fine engraving, spindle runout should typically be below 0.01 mm at the tool shank; excessive runout increases minimum engraving width and leads to chatter and premature tool wear.
Surface Finish Problems and Burr Formation
Poor surface finish and burrs are among the most common issues in CNC engraving. They are caused by incorrect cutting parameters, tool wear, and machine vibration.
Causes of Rough or Striated Surfaces
Rough surfaces can come from several sources:
Main technical causes:
- Feed per tooth too high, generating visible scallops.
- Spindle speed too low for small-diameter tools, causing tearing instead of cutting.
- Step-over or step-down too large, leaving high cusp height.
- Tool runout or bent tools generating uneven cutting loads.
- Machine vibration due to poor clamping or aggressive acceleration.
Parameter Ranges and Practical Corrections
For small engraving tools, use conservative chip loads. As a reference (values depend on tool and material):
Typical starting surface finish parameters:
- Tool diameter: 0.5–3 mm for metal engraving; 1–6 mm for wood and plastics.
- Feed per tooth (fz) for aluminum with micro end mills: 0.005–0.03 mm/tooth.
- Feed per tooth for steel with micro end mills: 0.003–0.02 mm/tooth.
- Spindle speed: 18,000–40,000 rpm for tools below 1 mm; 10,000–24,000 rpm for tools 1–3 mm, as allowed by the spindle.
- Radial step-over for finishing: 5–15% of tool diameter.
Corrective actions include increasing spindle speed within tool limits, reducing feed and step-over, switching to a finishing pass with smaller parameters, and verifying tool runout and concentricity.
Burr Generation and Deburring Strategies
Burrs on edges and characters are common, especially in ductile metals and plastics. They are typically caused by dull tools, low cutting speed, excessive feed, or rubbing instead of clean cutting. Tool geometry with inadequate rake angle or poor clearance also promotes burr formation.
To reduce burrs:
- Use sharp tools with polished flutes in aluminum and plastics.
- Increase cutting speed slightly and avoid very low chip loads that cause rubbing.
- Program a light finishing pass with 0.01–0.05 mm stock to remove burrs.
- Optimize toolpath direction: climb milling often produces less burr than conventional milling.
- Use appropriate coolant or mist to reduce built-up edge in metals.
In many cases, slight adjustment of the last-pass depth and feed achieves a clean edge without secondary manual deburring.
Dimensional Accuracy and Positioning Errors
Precision engraving requires consistent line widths, depths, and positions. Deviations arise from machine calibration, thermal expansion, backlash, and tool deflection.
Backlash, Lost Steps, and Calibration
Backlash is the clearance between moving components that causes delayed motion when reversing direction. It leads to undersized or distorted shapes, especially small text and geometric patterns.
Key corrective steps:
- Measure backlash via dial indicator: command small moves in opposite directions and note any lag.
- Compensate in the control: most controllers allow backlash compensation per axis.
- Check belt tension, ball screw nuts, and linear bearing preload; tighten within manufacturer limits.
- Calibrate steps per unit for each axis using a precise measuring tool over a known distance.
If using steppers, ensure current settings and acceleration/jerk values are conservative enough to prevent lost steps during rapid changes in direction typical of engraving toolpaths.
Tool Deflection and Its Compensation
Small-diameter tools deflect easily under cutting forces, causing deviations in geometry and depth. Deflection increases with tool overhang, cutting forces, and feed per tooth.
To reduce deflection:
- Minimize tool overhang: extend the tool only as much as required to clear the workpiece.
- Use larger diameter tools where possible, especially for roughing the engraving area.
- Reduce radial engagement and step-down when using long, small-diameter tools.
- Use stiffer tool holders and ensure collet nut torque is within specification.
Some CAM systems allow radial compensation for deflection; using slightly offset toolpaths can improve dimensional accuracy for critical contours.
Workpiece Coordinate System and Reference Errors
Incorrect zero points cause offsets in engraving location. Errors arise from misaligned work coordinate systems, incorrectly probed points, and misinterpretation of the fixture origin.
Recommendations:
- Use probing routines or touch-off tools for consistent Z reference and depth control.
- For repeated jobs, use fixed fixtures with defined datums to eliminate manual re-zeroing errors.
- When engraving on curved surfaces, apply surface mapping or correct geometry in CAD/CAM instead of assuming planar surfaces.
Engraving Depth and Inconsistent Z-Level Issues
Engraving depth affects visual appearance, legibility, and functional performance. Inconsistent depth results in faded text, breakthrough of thin walls, and non-uniform fill for inlays.
Common Causes of Depth Variation
Depth inconsistencies mainly come from:
- Workpiece not flat or not parallel to the machine table.
- Tool length measurement errors or inconsistent tool seating in collets.
- Spindle or Z-axis play, loose couplings, or worn guides.
- Uneven sacrificial boards or spoilboards on routers.
- Surface coatings or films not accounted for in zero setting.
Surface Mapping and Planar Compensation
For large-format engraving, minor table irregularities cause significant depth variation compared with shallow engraving depths. A practical approach is to map the surface and compensate in the control or CAM.
Implementation steps:
- Probe multiple points on the workpiece surface to generate a height map.
- Use control features that allow Z compensation based on the map, or apply a mesh in CAM to project toolpaths onto the actual surface.
- Frequently resurface sacrificial boards with a facing tool to ensure planer reference.
Shallow text, often 0.05–0.3 mm deep in metals and 0.2–0.8 mm in plastics, is especially sensitive to small variations, so accurate planar control is important.
Z-Axis Mechanics and Tool Zeroing
Mechanical looseness in Z-axis components directly creates depth errors. Check for axial play by manually applying upward and downward force on the spindle with the machine powered off and measuring movement with an indicator.
Good practices include:
- Regularly inspect and tighten Z-axis couplings and linear guide blocks within specified torque ranges.
- Use a repeatable tool setting gauge or automatic tool length measurement system.
- Clean the tool shank and collet before installation to avoid seating on debris.
Tool Breakage, Excessive Wear, and Life Management
Tool breakage is a major source of downtime and scrap in CNC engraving, especially with micro-tools. Excessive wear reduces surface quality and increases cutting energy.
Mechanical and Thermal Causes of Tool Failure
Important mechanical factors:
- Excessive feed rate for tool diameter and material.
- Too much axial or radial depth of cut, leading to overload.
- Sudden engagement due to incorrect entry strategies.
- Tool collision with clamps or workpiece features not modeled in CAM.
Thermal factors include insufficient cooling in difficult-to-cut metals, rubbing due to low chip load, and chip recutting caused by poor evacuation. These phenomena cause thermal cracks, edge rounding, and coating damage.
Recommended Chip Loads and Cutting Speeds
For micro-tools, chip load values are small but must remain above zero to prevent rubbing. Representative starting values (to be refined per tool manufacturer):
- Carbide end mill, 1 mm diameter, aluminum: fz ≈ 0.01–0.02 mm/tooth, vc ≈ 150–250 m/min.
- Carbide end mill, 1 mm diameter, low-carbon steel: fz ≈ 0.005–0.015 mm/tooth, vc ≈ 60–120 m/min.
- Carbide ball nose, 0.5 mm diameter, hardened steel: fz ≈ 0.002–0.008 mm/tooth, vc ≈ 40–80 m/min.
- Single-flute cutter, 2 mm diameter, acrylic: fz ≈ 0.02–0.06 mm/tooth, vc ≈ 200–400 m/min.
Use spindle speed and feed calculations based on these values. For example, feed (mm/min) = rpm × flute count × fz. Monitoring spindle load during operation allows further optimization without overloading the tool.
Entry, Exit, and Toolpath Strategies to Reduce Stress
Toolpaths have strong influence on tool life:
- Use ramp or helical entries rather than plunging into solid material.
- Avoid full-width slotting with micro-tools; instead, use trochoidal or peel strategies with limited engagement angles.
- Reduce feed when exiting the material to prevent edge chipping, especially in brittle materials.
- Configure lead-in and lead-out arcs rather than sharp directional changes at engraving start and end points.
In high-precision engraving, it is often effective to separate roughing and finishing: use a slightly larger tool for roughing with robust parameters, then a smaller tool for a light finishing pass.
Chatter, Vibration, and Toolpath Marks
Chatter and vibrations show up as repetitive patterns or wave-like marks on the engraved surface. They result from dynamic instability between tool, workpiece, and machine structure.
Recognizing Vibration Patterns
Chatter marks often form regular bands or ripples on flat surfaces, especially in corners or during direction changes. Fine tools leave visible waves even for small vibration amplitudes. Spectral analysis of spindle or axis vibration via accelerometers can provide deeper insight, but visual inspection is often sufficient for basic troubleshooting.
Machine Stiffness and Clamping Considerations
Insufficient clamping is a frequent cause of vibration:
- Use rigid fixtures and minimize overhanging parts.
- Apply uniform clamping pressure without distorting thin plates.
- Where possible, support thin workpieces with vacuum tables or full-surface backing plates.
Ensure machine components are tightened to specifications, particularly spindle cartridge mounts, gantry connections, and linear guide bolts. Loose connections reduce natural frequency and amplify chatter.
Parameter Tuning to Suppress Chatter
If chatter appears at a given combination of speed and feed, adjust parameters to move away from resonance. Practical steps include:
- Change spindle speed by 5–20% while keeping chip load within acceptable limits.
- Reduce radial engagement or step-down, which lowers cutting force and excitation.
- Use shorter tools and more rigid holders.
- Select climb milling where machine backlash control is adequate.
In some cases, slightly increasing feed while reducing spindle speed can stabilize cutting by increasing chip thickness and reducing rubbing.
Heat, Melting, and Material Smearing
Thermal issues such as melting, smearing, and discoloration are frequent in plastics, aluminum, and copper alloys. Excessive heat deteriorates surface quality and tool life.
Plastics: Avoiding Melting and Edge Whitening
When engraving acrylic or other thermoplastics, heat can cause edge melting, micro-cracks, and whitening. Causes include:
- Too high spindle speed with very low feed, causing friction instead of cutting.
- Poor chip evacuation leading to recutting of hot chips.
- Dull tools or inappropriate tool geometry.
Mitigation measures:
- Use single-flute or two-flute cutters specifically designed for plastics.
- Increase feed rate while maintaining clean cutting, ensuring chips are thrown away from the cut.
- Use air blast or mist (compatible with material) to cool and clear chips.
- Avoid dragging the tool across already machined surfaces at slow feed with constant contact.
Metals: Heat Spots, Discoloration, and Work Hardening
In metals, excessive heat can result in blue or brown heat-affected zones, work hardening on stainless steels, and loss of dimensional stability. To limit heat:
- Maintain an adequate chip load to avoid rubbing.
- Apply coolant or mist, especially in stainless steel and titanium engraving.
- Use coated tools with proper edge preparation to reduce friction.
- Shorten the engagement time by using segmented toolpaths that allow chips and heat to exit the cutting zone.
Coolant, Air Blast, and Chip Evacuation
Chip evacuation is crucial in narrow engraving paths. Packed chips cause recutting, higher temperatures, and tool breakage. Effective solutions include:
- Directed compressed air to blow chips out of grooves and pockets.
- Minimum quantity lubrication (MQL) for metals where flood coolant is not practical.
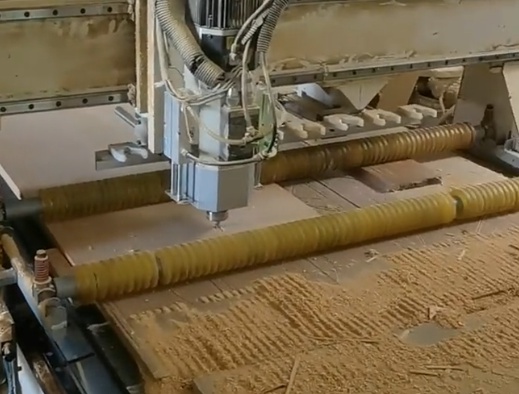
- Vacuum extraction for wood and composites to clear dust and reduce health risks.
Programming, CAM Settings, and G-Code Issues
Even with optimal hardware, programming errors and inadequate CAM settings can create engraving defects, collisions, or inefficient toolpaths.
Feed, Speed, and Acceleration in the Controller
If controller limits or overrides are not aligned with CAM assumptions, the actual cutting conditions differ from those intended. For example, a controller may cap maximum feed, leading to excessive heat from prolonged contact time.
Key checks:
- Ensure maximum feed and acceleration in the control do not force large slowdowns in tiny segments typical of engraving text.
- Verify that look-ahead settings can handle short, dense G-code sequences without generating stop-and-go motion.
- Check that G-code units (mm or inch) match controller settings to avoid catastrophic mis-scaling.
Toolpath Strategies for Fine Details and Text
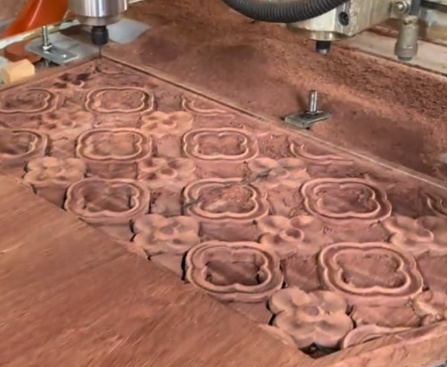
Fine text requires specific CAM strategies:
- Use V-carving or V-engraving toolpaths for variable-width strokes based on depth.
- Limit minimum feature size and avoid trying to engrave details smaller than the tool tip radius.
- In pockets or filled areas, use raster or zig-zag strategies with small step-over for uniform surfaces.
- For multi-layer engraving (e.g., two-depth text), program separate operations with controlled depth and tool change routines.
Simulating the toolpath in CAM and, where available, in the controller reduces the likelihood of tool over-travel and collisions with clamps or fixtures.
Common G-Code and Post-Processor Pitfalls
Frequent code-related issues include missing tool length compensation calls, incorrect plane selection for arcs, and inconsistent use of absolute and incremental coordinates.
Guidelines:
- Use consistent coordinate modes (e.g., G90 for absolute, G91 only where necessary).
- Call the correct tool length offset (e.g., G43 Hxx) before engaging in the material.
- Keep work coordinate systems (G54–G59 etc.) clearly documented for each fixture.
- Verify that the post-processor matches the control type, especially for arc formats (G2/G3 with IJK or R modes).
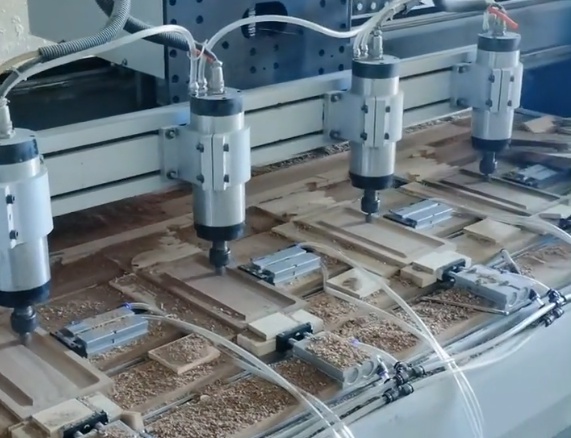
Fixturing, Workholding, and Reference Management
Workholding directly affects engraving quality. Movement or deformation under cutting forces leads to positional errors, chatter, and depth variation.
Clamping Thin Plates and Flexible Parts
Thin plates easily bend during clamping and cutting. This results in non-uniform depth and distorted patterns. To mitigate:
- Use full-surface backings such as sacrificial plates or vacuum tables.
- Avoid concentrated clamping points that cause local bending; use spread-out clamping forces.
- Engrave multiple shallow passes instead of a single deep pass to reduce cutting force.
Engraving on Curved or Irregular Surfaces
When engraving on curved parts (such as cylindrical components or molded surfaces), planar toolpaths lead to variable depth. Options include:
- Use 4-axis or rotary engraving to keep the tool normal to the local surface where applicable.
- Project text or patterns onto the 3D surface in CAD/CAM to generate correct 3D toolpaths.
- For simple cylindrical work, use wrapping functions that translate linear X or Y into rotational motion.
Repeatability for Production Engraving
For repeated jobs, consistent referencing saves setup time and reduces the chance of mistakes:
- Implement fixed fixtures with pins and reference edges tied to a known coordinate system.
- Store work offsets for each fixture or product and reload them as needed.
- Use QR codes or printed labels on fixtures to identify the correct program and work coordinate system.
Inspection, Quality Control, and Process Optimization
Systematic inspection and feedback help refine engraving processes and maintain quality over long production runs.
Measuring Depth, Width, and Surface Roughness
Important measurement tools include digital microscopes, optical comparators, depth gauges, and profilometers. These allow quantification of key parameters:
- Engraving depth: measurement at multiple points to detect variation.
- Line width: verifying that minimum and maximum widths meet design requirements.
- Surface roughness: assessing Ra where functional or aesthetic specifications exist.
Process Capability and Consistency
By recording tool life, parameter sets, and quality results, it is possible to determine reliable tool life intervals. For example, in a given aluminum engraving application, if a 1 mm tool consistently shows flank wear after 60 minutes of cutting time, a preventive replacement interval of 45–50 minutes can stabilize quality and avoid unexpected breakage.
Documentation and Standardization of Parameters
Creating parameter libraries per material and tool type improves repeatability:
- Standardize roughing and finishing parameters for materials commonly engraved.
- Record spindle speed, feed, step-over, and depth-of-cut per application.
- Maintain revision history when parameters are updated after process improvement.
Documenting proven combinations shortens setup time and reduces the risk of introducing new problems when changing operators or machines.
Systematic Troubleshooting Checklist
When engraving problems appear, a structured diagnostic approach prevents random parameter changes and wasted time. The following table summarizes a practical troubleshooting map.
| Problem | Probable Causes | Key Checks | Corrective Actions |
|---|---|---|---|
| Rough surface finish | Chip load too high, low speed, tool wear, vibration | Tool condition, runout, machine rigidity, parameters | Increase speed, reduce feed and step-over, replace tool, improve clamping |
| Heavy burrs | Dull tool, low chip load, improper tool geometry | Tool sharpness, cutting direction, material behavior | Use sharper tool, adjust speed and feed, add finishing pass |
| Depth inconsistent | Uneven surface, Z-axis play, zeroing errors | Flatness, Z mechanics, tool measurement | Resurface base, map surface, tighten Z-axis, improve zeroing procedure |
| Tool breakage | Overload, high engagement, poor chip evacuation | Parameters, toolpath entry, chip accumulation | Reduce depth and engagement, improve entry, add air/coolant, adjust feed/speed |
| Chatter marks | Low stiffness, excessive overhang, resonant speed | Fixture rigidity, tool length, vibration at certain rpm | Shorten tool, change speed, reduce engagement, reinforce fixturing |
| Melting or smearing (plastics) | Heat buildup, high speed, low feed, chip recutting | Chip form, surface appearance, chip evacuation | Increase feed, use plastic-optimized tools, air blast, adjust speed |
| Engraving shifted or distorted | Backlash, lost steps, incorrect WCS | Axis backlash, stepper/servo tuning, WCS setup | Compensate backlash, reduce acceleration, confirm coordinates and fixture origin |
Conclusion
CNC engraving quality depends on coordinated control of material behavior, tool selection, machine rigidity, parameter settings, workholding, and programming. Most issues such as poor surface finish, burrs, depth inconsistency, tool breakage, chatter, and thermal damage can be systematically addressed by:
- Choosing appropriate tools and conservatively optimized chip loads and speeds.
- Ensuring mechanical integrity of the machine and fixtures.
- Applying structured CAM strategies tuned to fine details and small tools.
- Implementing reliable measurement, inspection, and documentation practices.
By treating CNC engraving as an integrated system and using disciplined troubleshooting methods, it is possible to achieve stable, repeatable, and precise engraving results across a wide range of materials and applications.